Getting Started#
This guide will step you through the process of self-hosting an app. We’ll use Photostructure as our example app. At the end of the guide, you’ll have a server you own up and running on which you can install apps, host websites, and backup your data. You can use our free-tier and bring your own computer to follow this guide completely for free!
1. Attach a computer to KubeSail#
The first question when self-hosting is: What computer am I going to use as my server?
I’ll use…#
The PiBox is our custom-designed self-hosting hardware. Order a PiBox at pibox.io, plug it in, scan the QR code on the screen, and start self-hosting! See the PiBox documentation for more details!
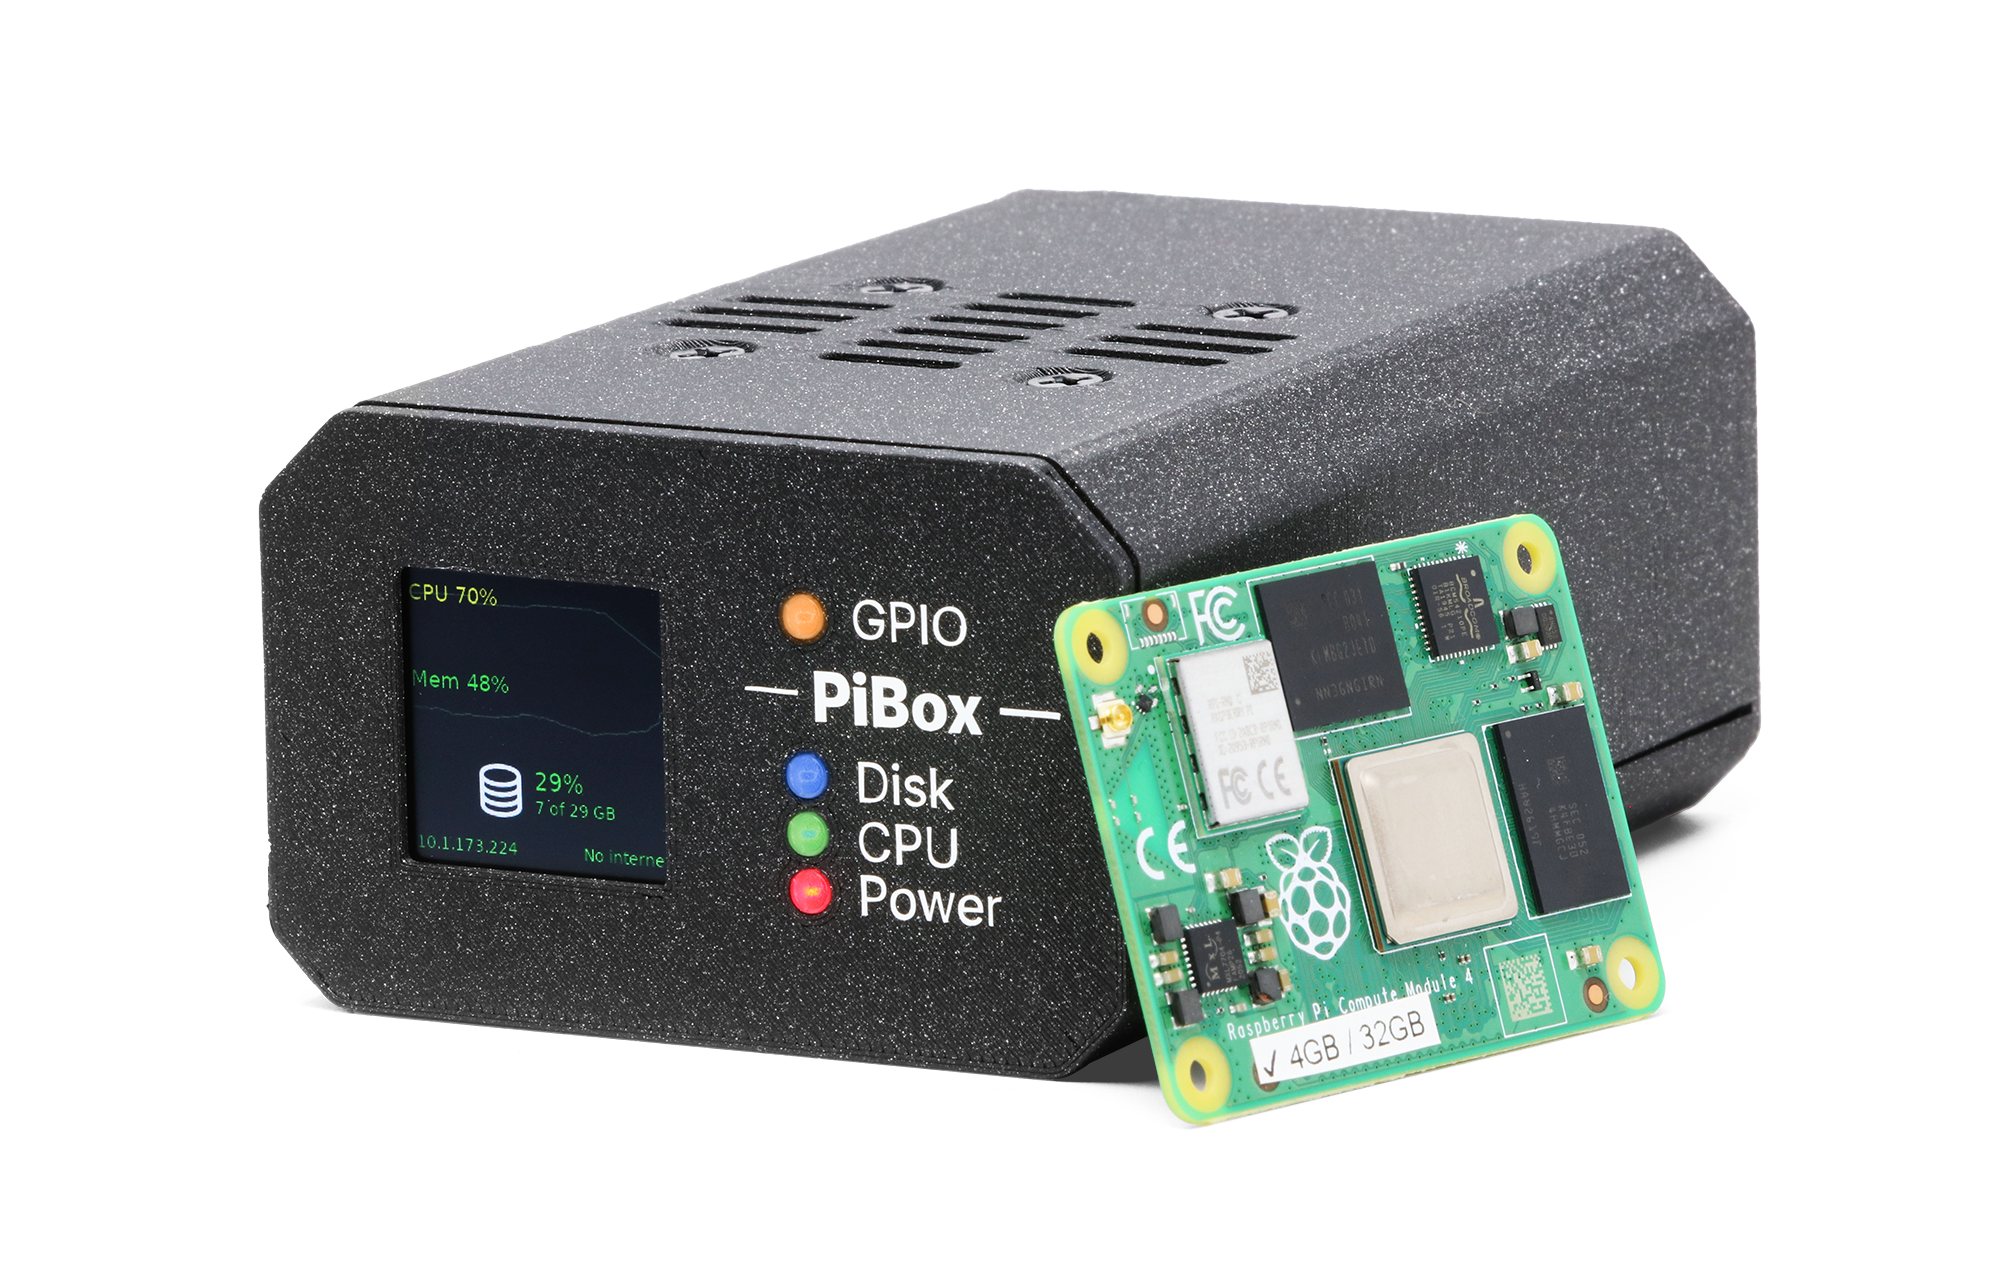

Plug and Play#
- Plug in Ethernet
- Plug in Power
- Toggle the switch located on the power cable
- Grab a coffee (or just wait about 30 seconds)
- Scan the QR code on the screen to continue!
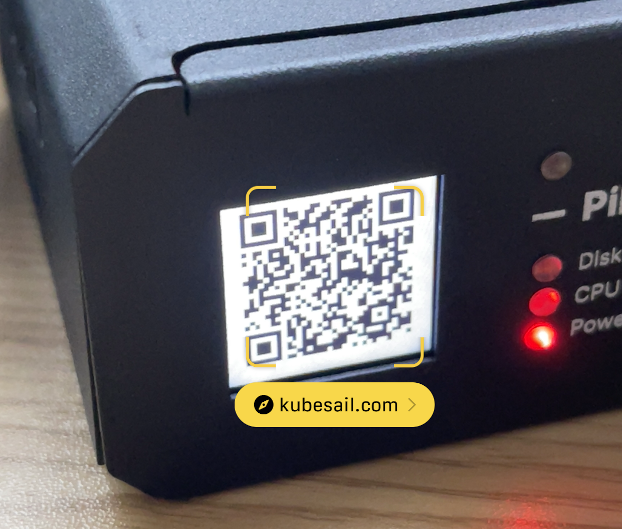
If for some reason setup fails, please let us know! You can toggle the power to the PiBox in order to get a new QR code.
KubeSail works on almost any PC, but we recommend a computer with at least the following:
- 4GB RAM (8GB recommended)
- 40GB disk space (80GB+ recommended)
- Wired internet connection (recommended)
a. Install Linux#
We recommend Debian 11, although most Linux distributions should work fine. See the Debian install guide or this tutorial from tecadmin. If you need a hand, our community might be able to help: join discord.
b. Install Kubernetes#
We recommend k3s which is very easy to install:
curl -sfL https://get.k3s.io | sh -
c. Attach to KubeSail#
Visit the KubeSail Dashboard, click “Clusters”, then Add Cluster. Choose “Bring your Own” and run the command that begins with kubectl create -f. Your new cluster should appear on the dashboard in a few moments!
We have a few guides for various popular cloud providers:
You should be able to use almost any provider of cloud or dedicated servers with KubeSail, so long as your server(s) run Linux and Kubernetes, you should be good. Check the “A spare PC I own” tab for generic setup instructions.
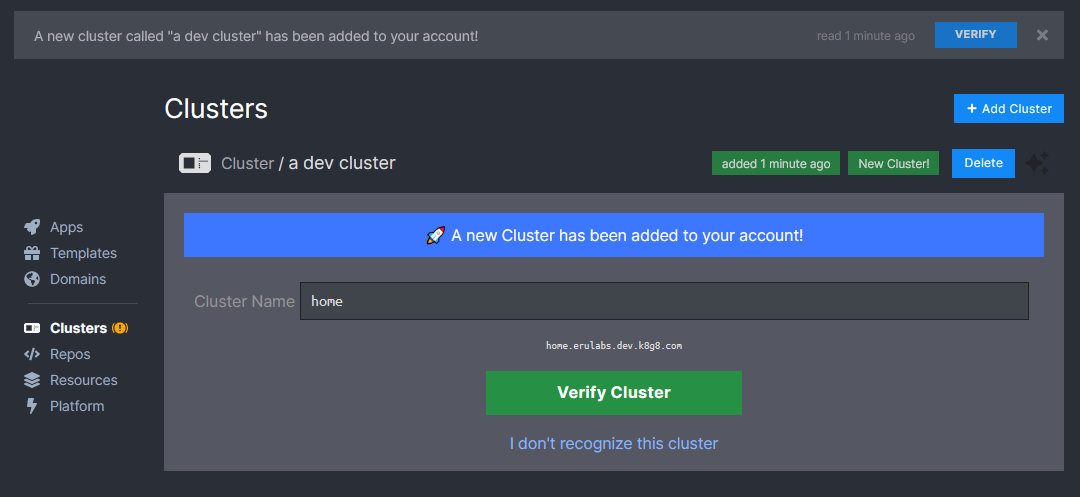
2. Verify Cluster#
If you’ve scanned the QR code on your PiBox, you can skip this step, otherwise, choose a name for your server and click Verify Cluster! This will attach your server to KubeSail. Checkout the core features or just install some apps and get started!
3. Install an App#
Visit the Template Store, where you can browse a selection of easy-to-install self-hosting apps. The majority of the apps in our Template Store are open-source applications, so please remember to support the authors of the apps you like! We plan on offering ways to directly donate to creators you like in the future.

Let’s choose Photostructure, a lightweight photo-manager that works great with the KubeSail App.
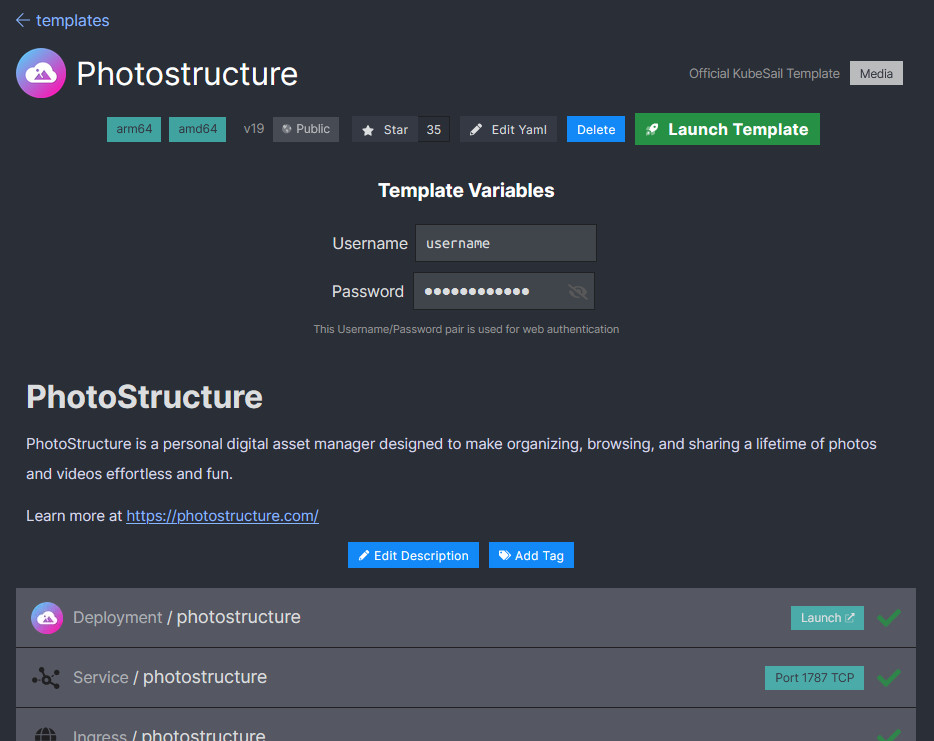
Click Launch Template, wait a moment while the app installs, and you should see a usable URL:

Click and link and log-in using the username/password on the Template install page.
Without any additional configuration, the KubeSail App will sync your devices photos into Photostructure’s photos Volume, and should appear in the Photostructure interface within a few moments!
There are more apps available in the Template Store, and we’re focused on adding more great self-hosted apps as quickly as we can. If you have any requests, please let us know!
4. Congratulations!#

Forgive us for the prequel meme. Still - we’ve gotten a lot working under the hood! You now have:
- A working Google Photos alternative
- A way to forward internet traffic to your device
- A platform for hosting websites and apps from home
More technically:
- A valid SSL certificate for your built-in
k8g8.comaddresses - Automatic dynamic DNS via built-in
ksdns.io - A full Kubernetes cluster
If you’ve made it this far, we’d love it if you’d join our community chat on Discord. If discord isn’t your style, your feedback would still be greatly appreciated at support@kubesail.com.
We’re a small startup with big plans. Hosting your own photos or recipes or blogs is a small but meaningful step towards repairing the way the internet operates, and we’re truly thankful that you’ve joined us on this journey!